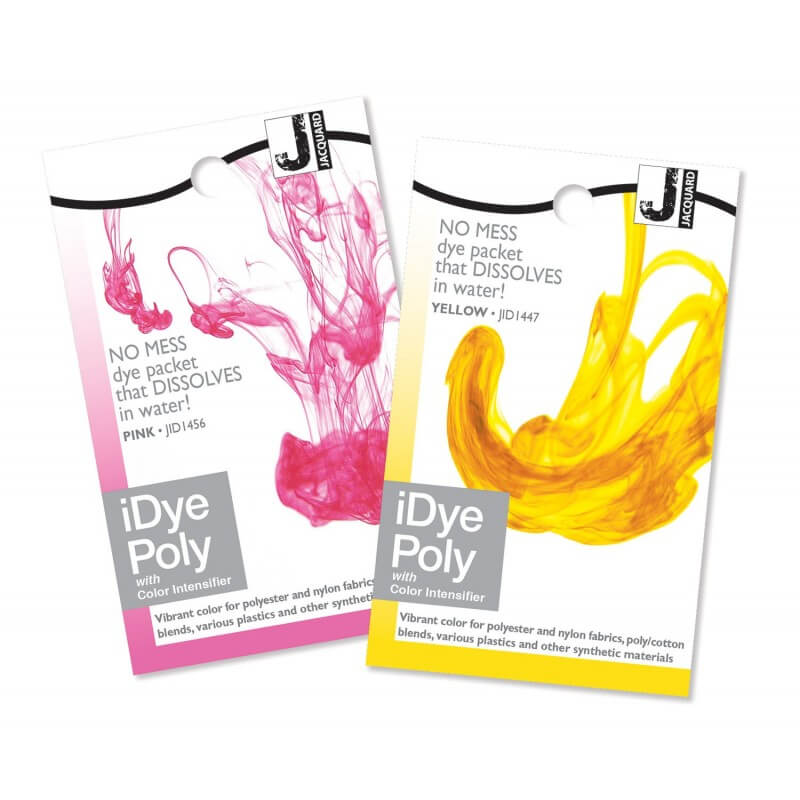
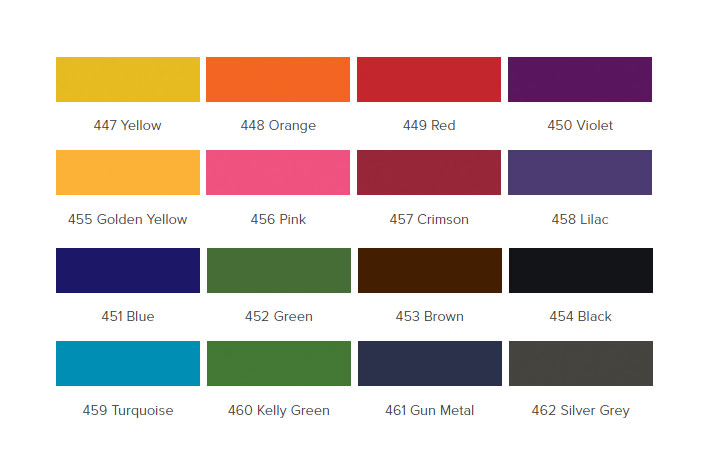
At the moment iDye Poly comes in 16 different colors, but the cool part is that you can mix them together! Also the time your pieces spend in the dye affects the vibrance and the darkness of the color. This allows you many color options to choose from.
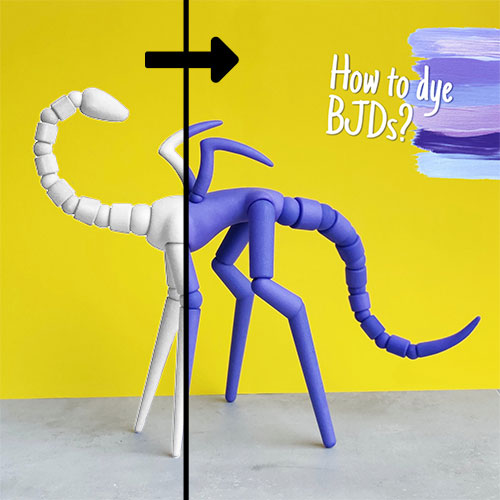
Next, let’s dye a doll!
*This is a decorative image, please don't dye your BJD with the elastics in place 🙂
If you don’t know if your doll can handle high temperatures, then this is a must! These are also handy for checking if the color is turning out as you like.
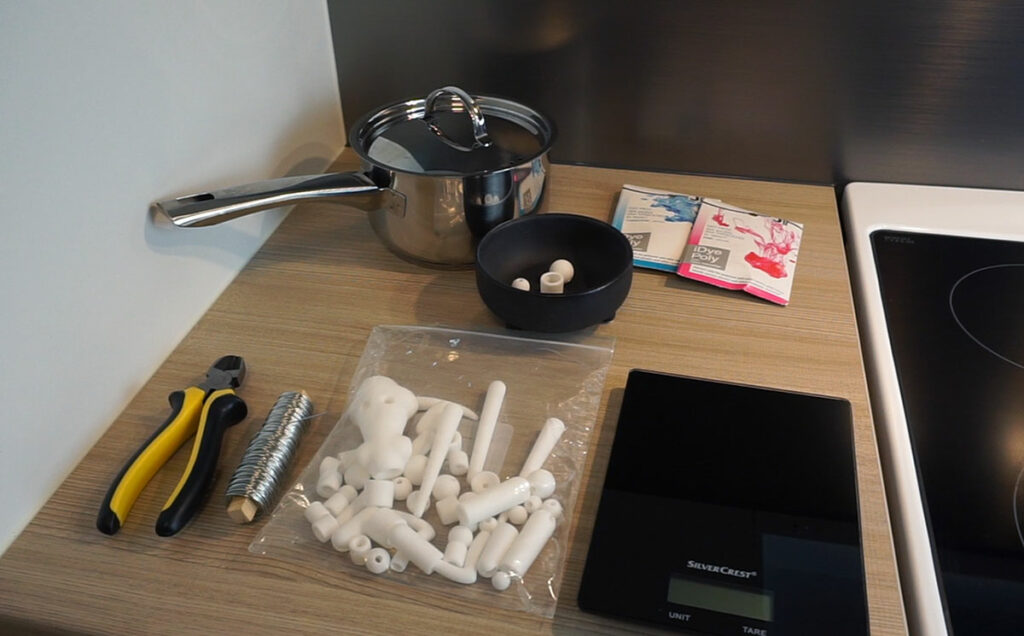
If you want to do math for how much iDye Poly you need for your doll.
How much dye do you need?
In Short: You can use the whole pack of dye by once. It is surely enough for any doll that can fit into a kettle.
This will waste some dye but if you only intend to dye your one doll it doesn’t really matter. If you want, you can store the rest of the color mixture (for example in a mason jar). It can be heated up and used later again as there is still coloring power left.
Longer version:
Plastic and fabric are surely not the same and are not equivalent to each other in terms of weight and volume. I made these calculations because I wanted some sort of estimation of how much dye I need, as it sounds that a full pack would be way too much.
One pack of iDye Poly can dye 1,3kg of fabric and my Salvador doll weighs 107g. Using napkin math one pack could dye at least 12 dolls. I could use this estimate only and pour into the kettle about 1/12 of dye. Even if I used too much it wouldn’t hurt, the doll would be dyed I would just waste a little bit of dye.
But nerd as I am I did calculate how much dye I would need. That’s where the scale comes to play. One pack of dye weighs 15 grams. 15g ÷ 12dolls = 1,25g/doll. I decided to use 2 grams, just to be sure that there is enough dye.
You can do the same calculation for your doll if you have a scale and interest. Just replace the numbers with the metrics of your doll.
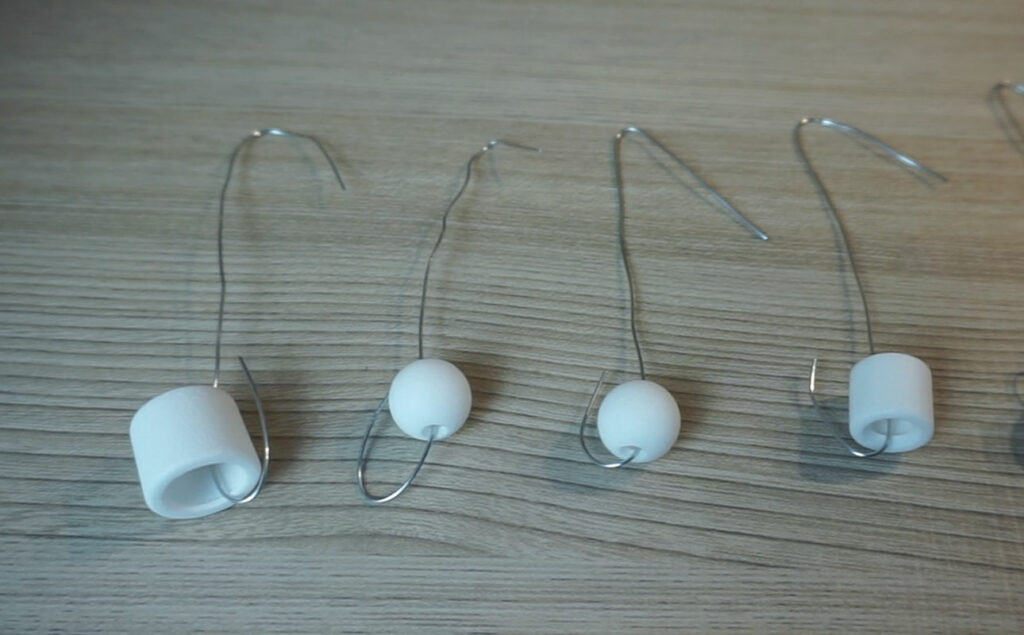
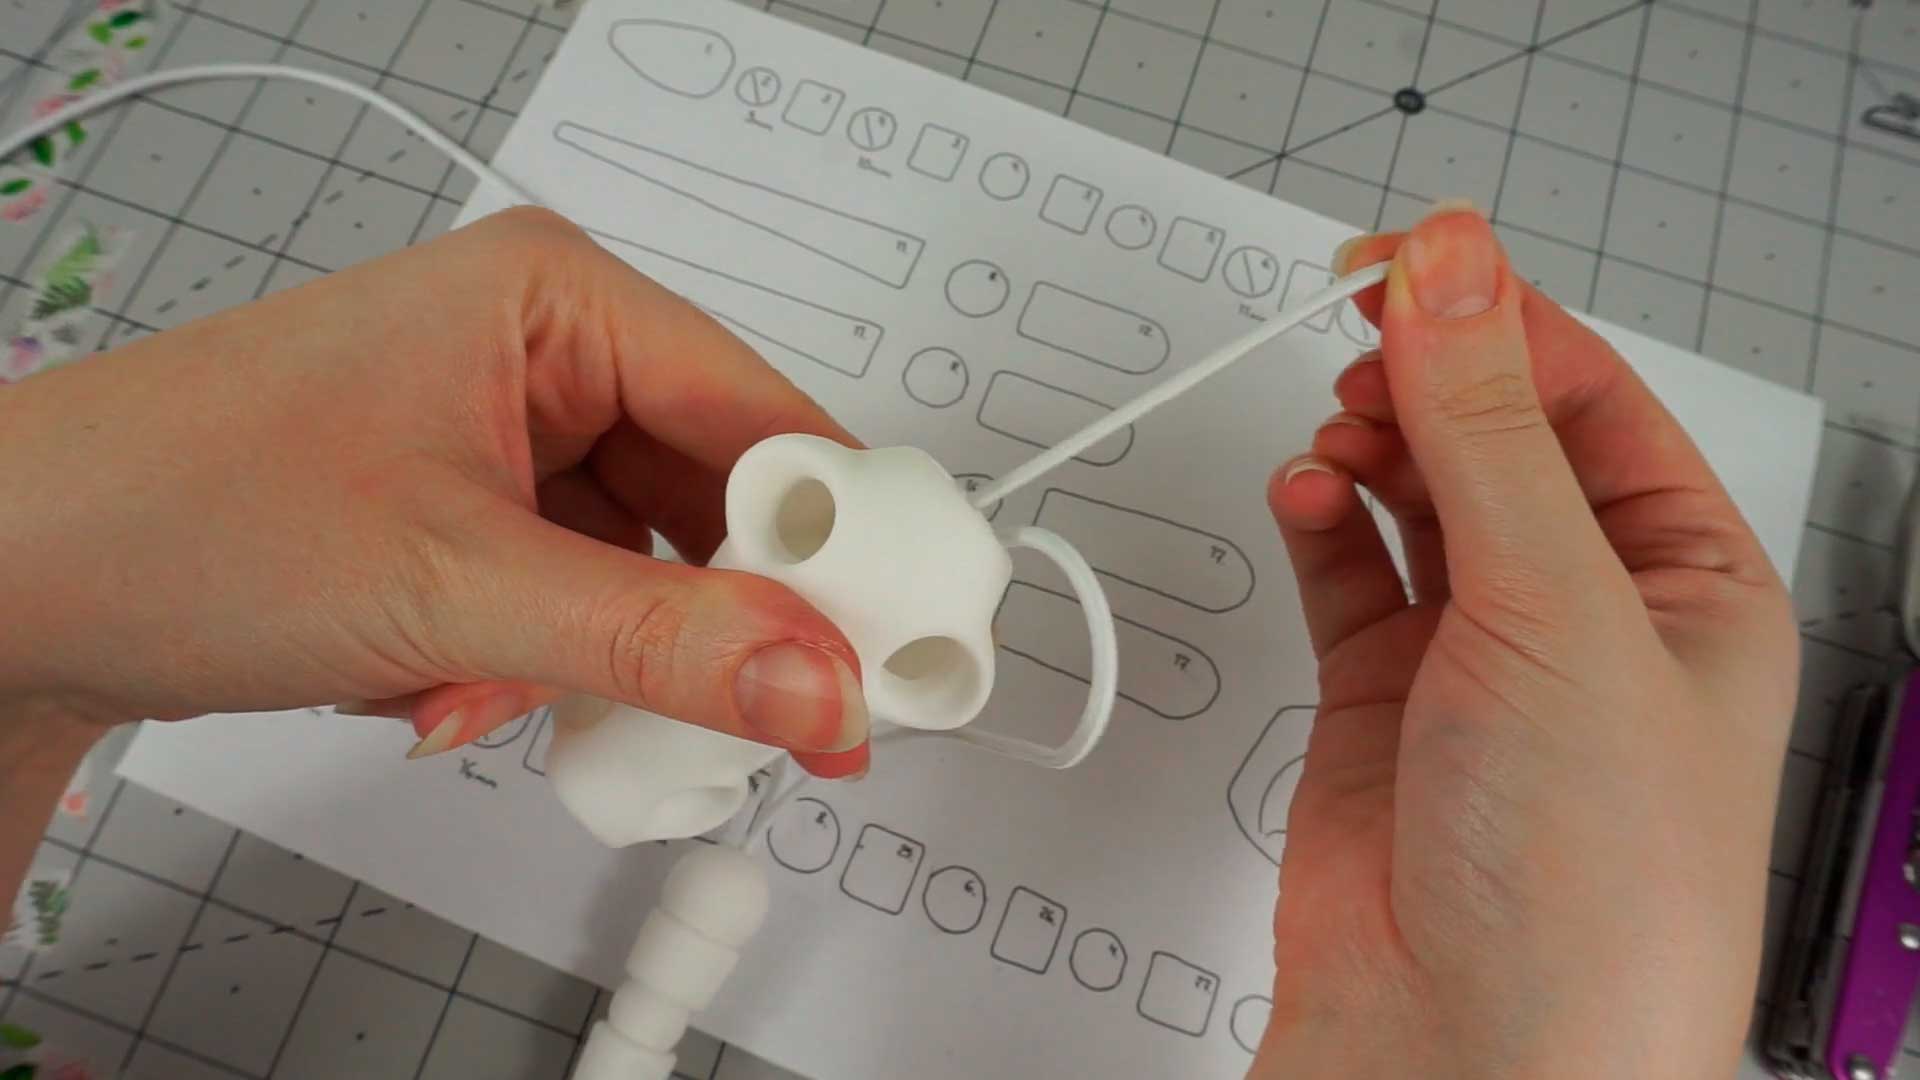
Preparing your test pieces
I wanted to test with a couple of pieces if the color is good. You could just throw the test pieces into the boiling dye, but I attached them to a wire to make it easier to find them.
Test pieces attached to a metal wire
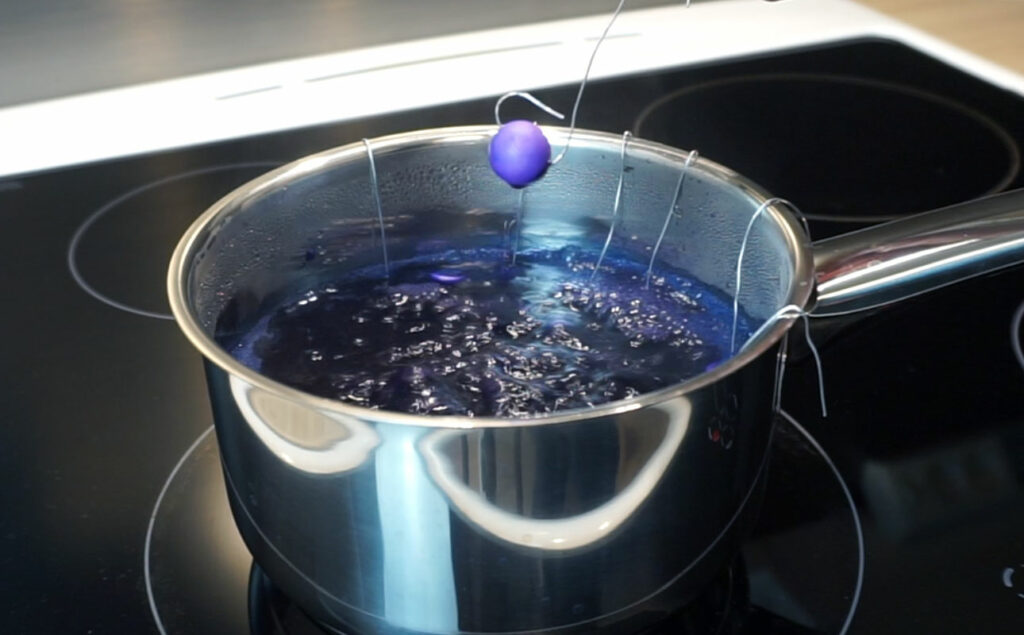
Test pieces hooked to the side of the dye kettle
Test for color I used two colors here: turquoise (459) and pink (456) mixed 1:1 (1g each). I’m glad I tested how the color looks because these turned out a bit too red. Now I know that I’ll make the doll’s mixture with more blue and less pink.
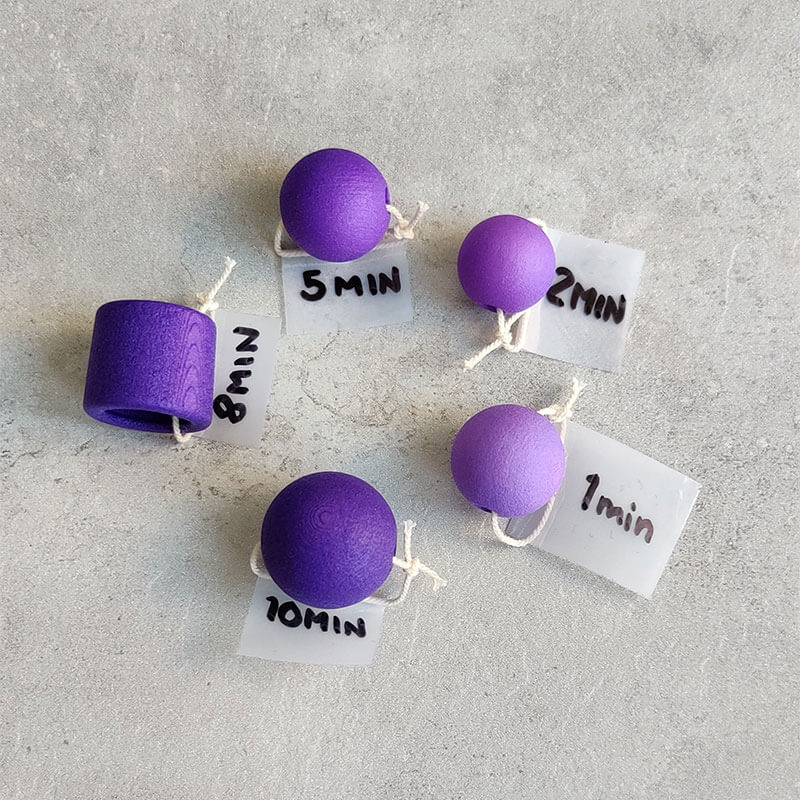
Test for darkness I also tested how time affects the color. The longer the pieces are in the dye the darker and more vibrant the color becomes.
Notice The lightest color tests that I made got some blue stains. When the dye was boiling it formed some bubbles on the surface. These bubbles created a blue stain if they touched the pieces. It is not visible on the darker pieces but it is noticeable on the lighter ones. This is good to note if you want a light color. I filmed this whole process and I got a good clip where you can see this staining. I’m working on a YouTube video of the whole process but editing it takes some time. I’ll link it here and announce it on my Instagram once the video is ready.
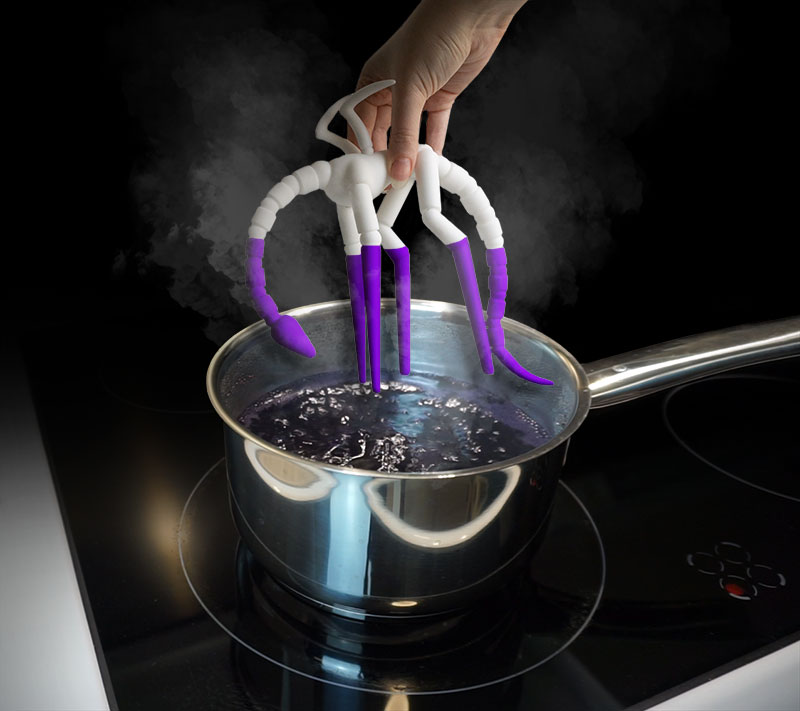
Time to dye a BJD
Fill your pot with water so that the doll pieces can all fit in under water. Don’t fill it too full though so it won’t boil over.
Mix your iDye Poly carefully in the water. You don’t want any pigment floating around without dissolving, this might leave noticeable stains.
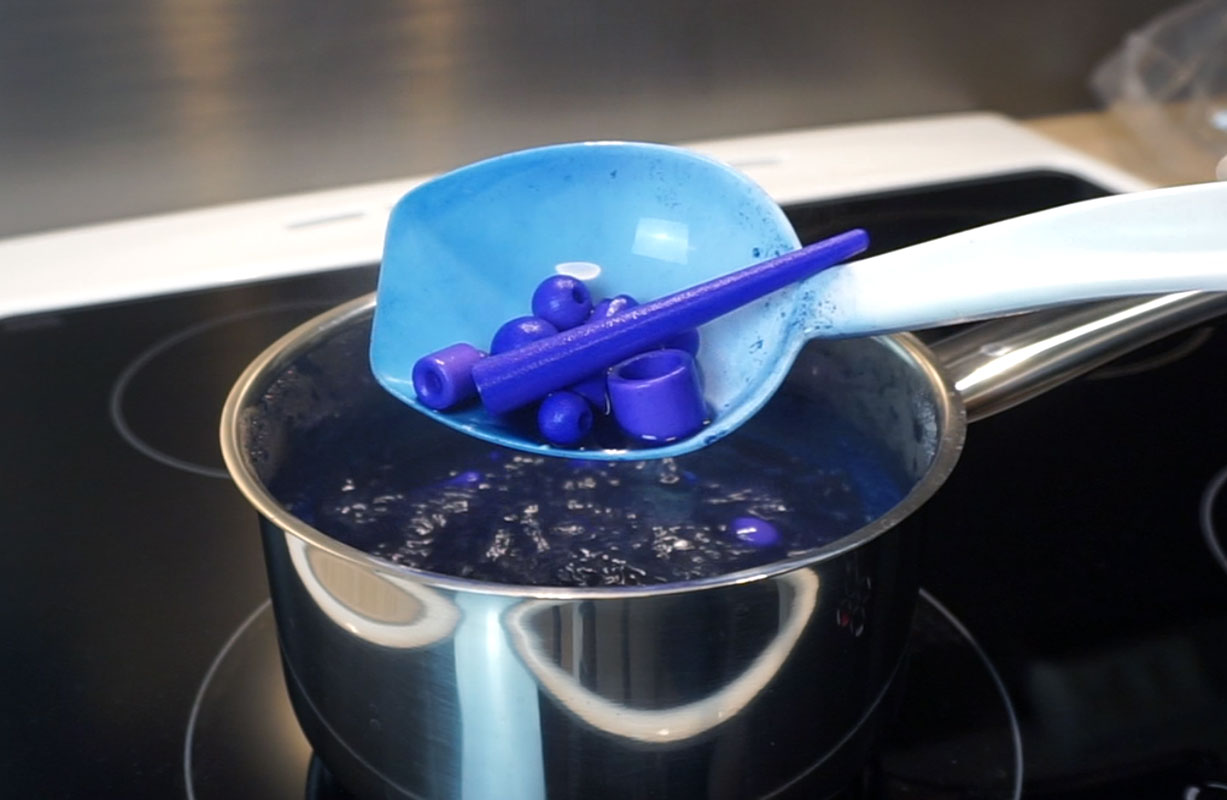
Wait until the water boils
Scoop your doll pieces in the water
Stir the pieces while they’re in the dye to make sure that they’ll all get even color
Take pieces out once the desired color has been achieved. The color will be lighter once the pieces dry. (see example photo later)
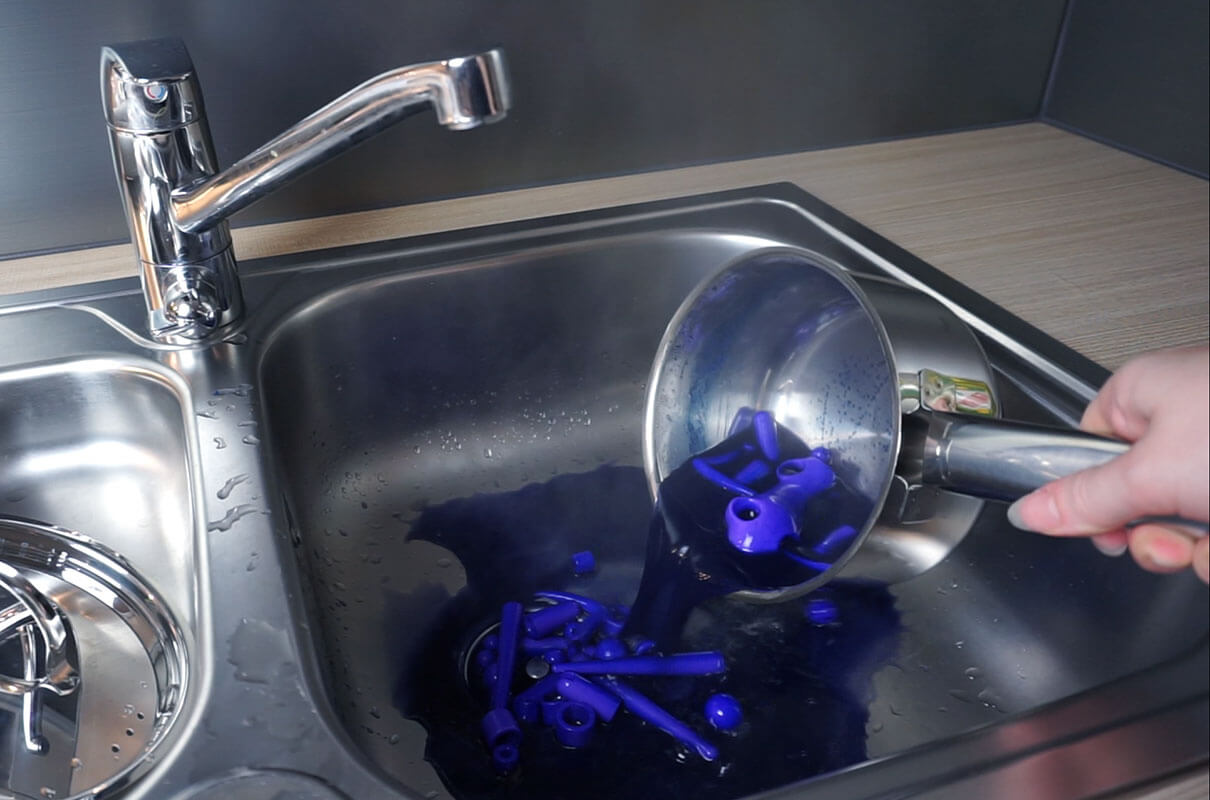
Rinse and dry
I gave my pieces 13 minutes in boiling dye
I poured the hot mix in the drain, and cooled the pieces off with some cold water
The pieces appear darker when they're wet. Here you can see the color difference with wet and dry
Durability of the color and finishing thoughts
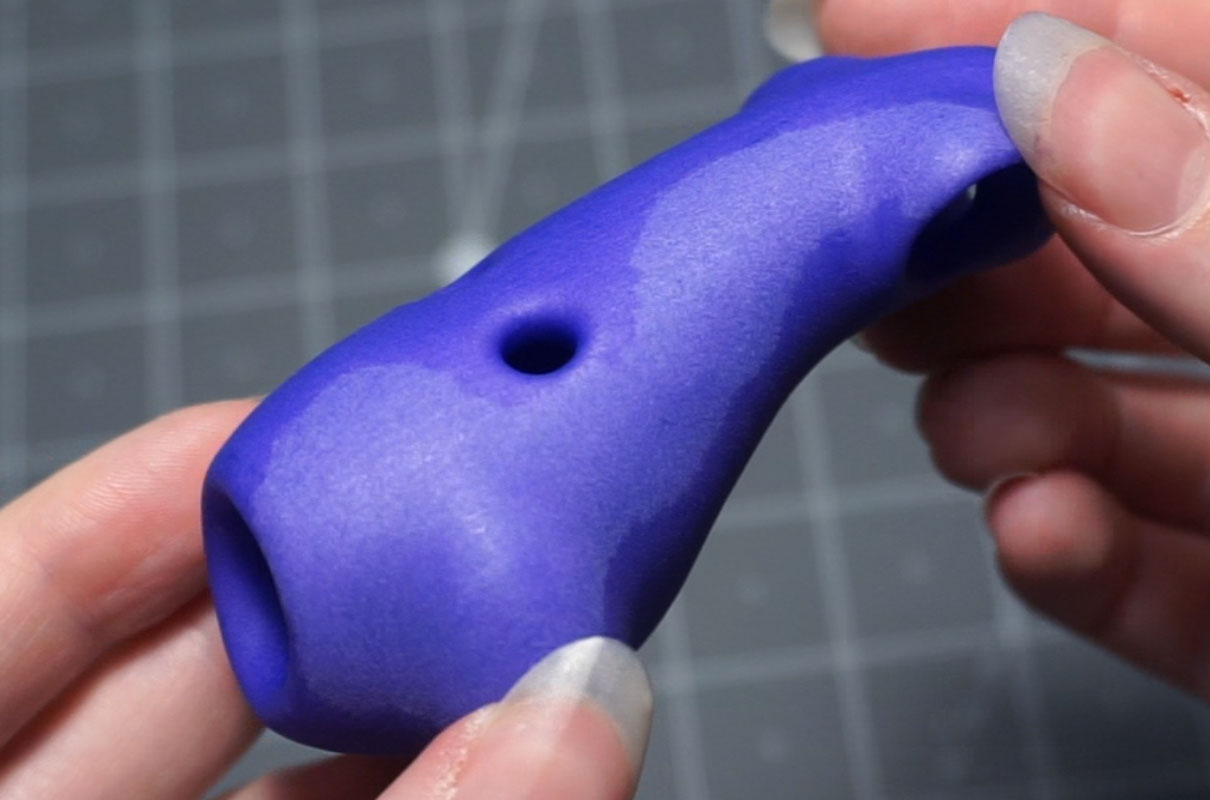
The color is durable. I tested rubbing two pieces against each other over 1000 times (yes I counted). There wasn’t any change in the surface, no glossiness no wear. Anyhow the dye doesn’t go into the material. I tried cutting and sanding a dyed surface and the white appeared.
You can't sand the pieces after the dye. Unless you want to create some sort of effect with the original color
I really love how my doll turned out. I will be using this method in the future too for our dolls as it’s an easy and fast way to get a durable base color on the dolls. In the future, I will experiment more on how to make different kinds of effects and how to combine multiple colors. YouTube video of this process will be published once I’m done with it!
Hopefully, this article was helpful with your creative projects. I sure wish I had a guide like this before starting. As I mentioned, I dyed one of our Salvador dolls. If you’re interested in them, you can find more information about them on the Salvador page.